How to Straighten a Photo in Lightroom
There are many methods to straighten a photograph using Lightroom. A few tools can assist you in doing the job right.
Alternative 1: Turn a Photograph by degrees
To rotate photos within Lightroom by a couple of degrees, you can use the Crop tool. When using Lightroom Classic, the Crop & Straighten tool is located in the Develop module. When you open Lightroom CC, select the Crop icon located in the right-hand column. The crop panels look similar but they are not identical.

Adjust the tool's Angle or Straighten
Its Angle slider (Classic) or Straighten slider (CC) turns your photo in increments of zero @ in the centre and 45o at the ends. The angle tool is moved towards the right to rotate the image clockwise. Turn it towards the left side to rotate counterclockwise.
To input manually the degrees of rotation, simply click the number that is to to the right side below the slider. Start by clicking the minus sign for those who want to turn counterclockwise. Enter zero or double click on the word 'Angle' within Classic or on 'Straighten' CC to stop the rotation.
Option 2. Make use of to use the Spirit Level tool or Level Line
The photo can be rotated by selecting a line that must be straight. Make use of to use the Spirit Level tool to the left of the Angle slider. This Spirit Level tool pops out and is attached to the cursor.
Move along a line within your photo you want to be at a level. After it is time to release, Lightroom adjusts your image to make the line even.
Press the option key after you have selected the Spirit Level tool. This creates a grid on your line and will help you make sure that the photo is level.
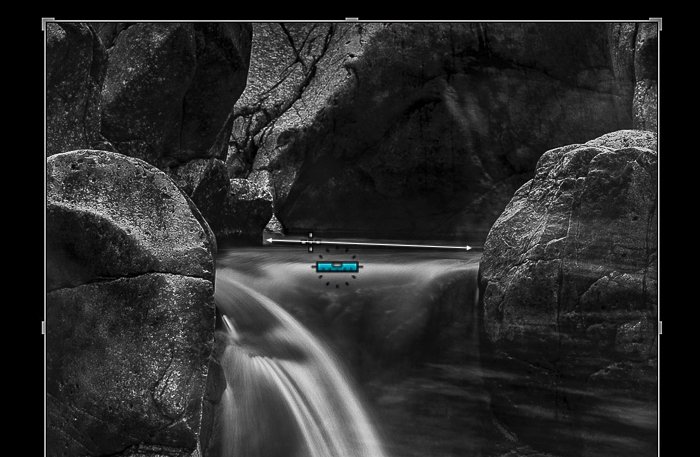
Screenshots of Lightroom using the Spirit Level tool on a black and white waterfall image
There isn't any Spirit Level icon in Lightroom CC. However, you can hold the Ctrl/Command keys and drag the line across your photo. After it is time to release, Lightroom rotates the image to make it level with this line. This shortcut is also available within Lightroom Classic
Option 3. Auto Straighten
To automatically straighten a photograph within Lightroom Click the Auto button that is above the Straighten or Angle slider. Lightroom straightens an image by referencing a visible line. If the line isn't evident, the program displays the message'Couldn't straighten this photo by itself'. To automatically level your photo within Lightroom Mobile, click the Spirit Level tool.
Option 4 is to use an Corner Crop Handle
When you open the Crop panel, you can add edges to your photo. Move your mouse over the corner and it transforms into an angled double Arrow. Drag the corner to the left to rotate an image counterclockwise. Drag it to the right side to rotate clockwise. Within Lightroom Mobile, drag the corners or utilize the measurement tool beneath the image.

Digi5studios is the world’s professional photo enhancement company that specializes in professional photo editing. If you need photo retouching services. We provide image colour corrections, portrait image retouching, and Shadow and Reflection. You can also order creative photo manipulations and product photo editing, Removing Spots, Blemishes, and other imperfections, Color and Density Correction. Prices range starting from $0.30 up to $1 per image. send your pictures to this website.
Comments
Post a Comment